Assigning Image Scales in FrameMaker
When ePublisher converts images inserted into your source documents, it can scale images to make them display larger or smaller in your generated output. By default, ePublisher uses the scaling factor applied to images as specified by the image format you apply to each image. For example, if you apply an image format to images and the Stationery designer defined the image format to scale images to 80% of their original size, all images that have this image format applied to them will be scaled to 80% in the generated output.
Typically, using the standard scaling factor specified in the image format is sufficient. Occasionally, however you may want to override the scaling factor for an individual image. For example, while most .gif images scale to 80%, you may have one large image that you want scaled to 60% in your generated output. You can manually override the standard scaling factor specified in your Stationery for a specific image by using the GraphicScale marker.
To assign a scale to a specific image, your Stationery and template must have the GraphicScale marker type configured. Your output format must also support scaling by image.
The following procedure provides an example of how to specify image scaling for an image in Adobe FrameMaker source documents using unstructured Adobe FrameMaker 7.2. Steps for specifying image scaling for an image in Adobe FrameMaker may be different in other versions of Adobe FrameMaker.
To specify an image scale for an image in an Adobe FrameMaker source document
1. In your Adobe FrameMaker source document, locate the anchored frame for the image for which you want to specify image scaling.
2. Right-click on the image anchor. Make sure this is the entire anchor, not just the graphic itself
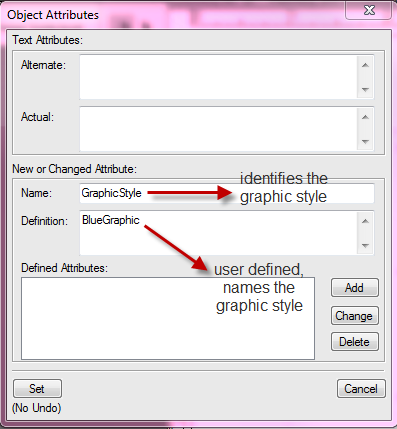
3. Click on Object Properties and then click Object Attributes. Identify the GraphicScale according to the box below. Assign the desired style name in the attribute value box.
4. Click Add, then Set, and then Set. Adobe FrameMaker may prompt you to approve the change as the operation cannot be undone
5. Save your Adobe FrameMaker source document.
6. Scan this document in ePublisher so that the GraphicScale marker will show up under “Marker Styles”. This will configure the correct marker behavior for processing.
7. Generate output for your project. For more information, see Generating Output.
8. In Output Explorer, verify ePublisher created the image using the image scale you specified in the GraphicScale marker by clicking on the page that contains the image for which you specified image scaling. For more information about viewing output files in Output Explorer, see Viewing Output in Output Explorer.
Last modified date: 11/30/2021