Creating New File Mappings
If there is a file extension that you would like to use but the file extension is not available in ePublisher in the default list of file extensions, you can create a new file mapping. To create a new file mapping, add a new file extension and associate, or map, the file extension to an ePublisher adapter. You can use the new, or custom, file mapping to specify that ePublisher open files using the new file extension with Adobe FrameMaker, Microsoft Word, or the built-in XML adapter. When you create a new file mapping, ePublisher saves information about the new file mapping you created, and you can apply the new file mapping to all of the subsequent projects that you open.
When you create a file mapping and specify an ePublisher adapter for the file extension, ensure the file extension can be opened using the content authoring tool associated with the adapter outside of ePublisher before you create the new file mapping. If the file extension cannot be normally opened using the content authoring tool, then ePublisher will also not be able to generate output from the source document using the ePublisher adapter.
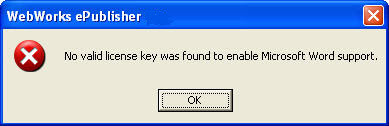
For example, assume your Contract ID enables licensing for ePublisher Express for FrameMaker. Next assume that you add HTML as a file mapping and associate the .html file extension with the Microsoft Word adapter. When you create the file mapping for the .html file extension with the Microsoft Word adapter, ePublisher allows you to add the HTML file to your project. However, since you do not have a valid license key for the ePublisher Express for Microsoft Word, ePublisher displays the following error message.
To create a new file mapping
1. If you want to create a new file mapping for a specific project, complete the following steps:
a. On the Project menu, click Project Settings.
b. Click the Add icon.
2. If you want to create a new file mapping for all of your ePublisher projects, complete the following steps:
a. On the Edit menu, click Preferences.
b. On the File Mappings tab, click the Add icon.
3. In the File extension field, type the file extension you want to use for the file mapping. For example, you can add .html as a file extension.
4. In the Adapter field, select the ePublisher adapter you want to associate with the file extension. The ePublisher adapter you associate with the file extension will be the ePublisher adapter that opens files with the specified file extension. For example, you can select Microsoft Word as the adapter for the .html file extension.
5. Click OK.
6. Click OK again. Each new ePublisher project you create after you modify the file mapping will use the ePublisher adapter you associated with the file extension.
Last modified date: 01/27/2022